


Installing Surveillance Cameras and Connecting to a Computer: A Comprehensive Guide by WEILAILIFE
Setting up surveillance cameras and seamlessly connecting them to a computer is a vital process that requires meticulous planning and execution. At WEILAILIFE, we are committed to simplifying this procedure for you. Follow these step-by-step instructions to ensure a successful installation of your surveillance equipment and the establishment of a solid connection to your computer.
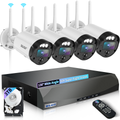
**Step 1: Determine Equipment and Quantity**
- Initiate the process by accurately assessing the number of surveillance cameras required and their intended locations. Be mindful of cable quantities, DVRs (Digital Video Recorders), and other relevant parameters. Creating a comprehensive equipment checklist will serve as your blueprint for purchasing.
**Step 2: Procure and Prepare Equipment**
- Once your equipment list is complete, proceed to procure the necessary items from reputable technology markets. Upon acquiring the equipment, prepare for the installation process.
**Step 3: Cable Connection**
- Skillfully execute cable connections based on the predetermined positions for both cameras and DVRs. In environments with suspended ceilings, adopt a strategy that initiates cable routes from the highest point of the ceiling, ensuring a neat and concealed layout. For spaces without suspended ceilings, consider the utilization of cable conduits or trays for an organized setup.
**Step 4: Camera Installation**
- With cabling successfully completed, proceed to install your surveillance cameras. For optimal functionality, cameras require suitable brackets and sturdy fixtures. Properly affix the camera onto the bracket's pan-and-tilt mechanism.
**Step 5: Back-End Device Installation**
- When it comes to storing captured surveillance footage, you have two distinctive options:
- Utilize a Video Capture Card: Install a high-quality video capture card into a designated PCI slot within the computer located in your surveillance vicinity. This card will diligently capture and store video content onto the computer's robust hard drive.
- Opt for a Digital Video Recorder (DVR): Embrace the convenience of a standalone recording device that operates independently of a computer. However, ensure you acquire a separate hard drive dedicated to video storage. Additionally, secure a monitor to facilitate effective image display.
**Step 6: Finalizing the Installation**
- As the project nears its conclusion, embark on the finalization process:
- Attentively secure the coaxial cable BNC connectors in place.
- Strategically route power cables for optimal safety and functionality.
- Implement secure fixing mechanisms to firmly position and stabilize all cables and wires.
Following the connection of BNC connectors and power routing, proceed to conduct comprehensive tests on the equipment.
**Step 7: Power On and Testing**
- Energize the surveillance devices, and anticipate the gratifying sight of camera images gracing the monitor. Refine the camera bracket adjustments to achieve the optimal surveillance angles and coverage. In the event a camera fails to display images during startup, diligently troubleshoot and rectify the issue.
At WEILAILIFE, we underscore the criticality of a methodical installation process to ensure an impervious surveillance system. By adhering to these meticulously outlined steps, you will embark on a journey towards effective monitoring and fortified security. Should any challenges arise or should you require further guidance, our team is readily available to provide expert assistance and unwavering support.